Sunday, May 26, 2013

Ji Dan Gao (Steamed Egg Cake)

Annyeong! Ji Dan Gao is an old school delight that many people fondly remember as the snack that they used to nom on when they were young. My parents and older siblings are one of them as well. For myself, I do not remember eating this when I was young... Or maybe I was too young to remember then. I made this couple of weeks ago but it failed to turn out well. Maybe it was due to the baking powder that I used, the cake did not rise up well and hence resulted in a stiff cake. I cannot let it go that I failed, hence today I tried my luck again and hurray, I SUCCEED! You know, nothing tastes better than success.

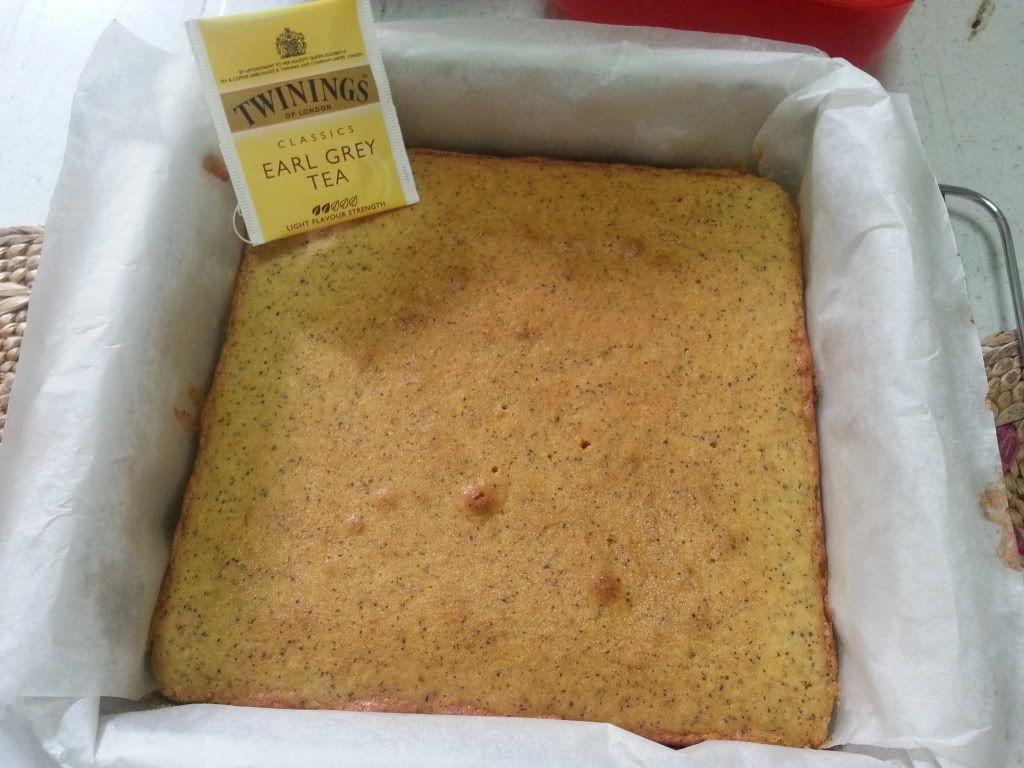
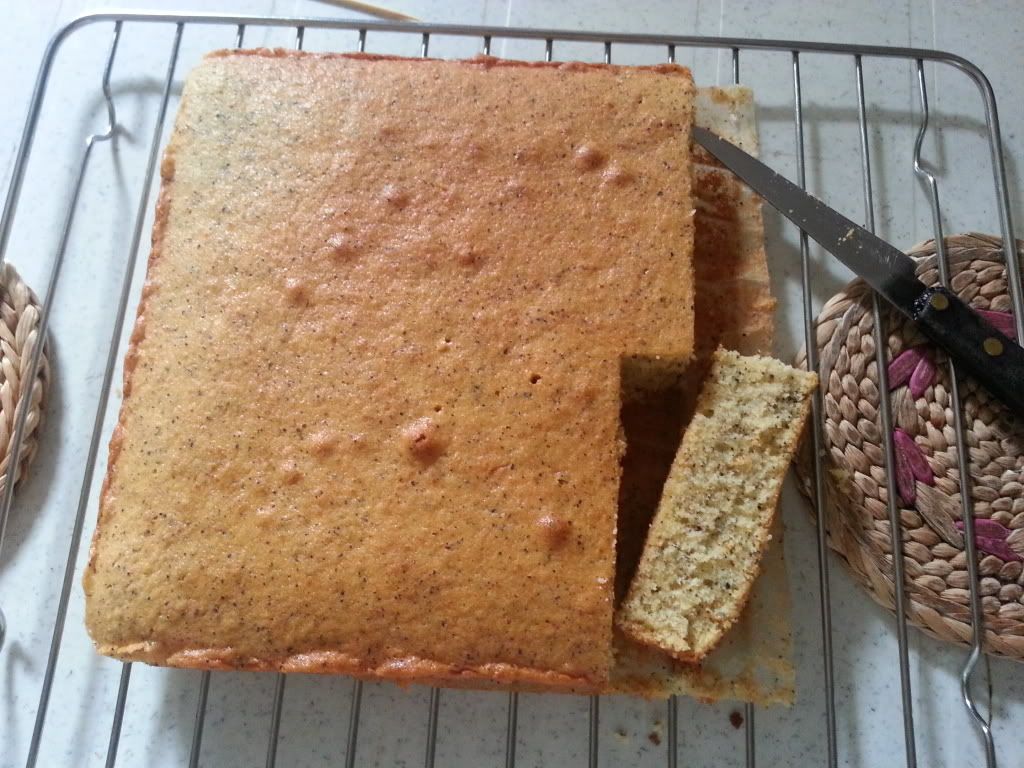
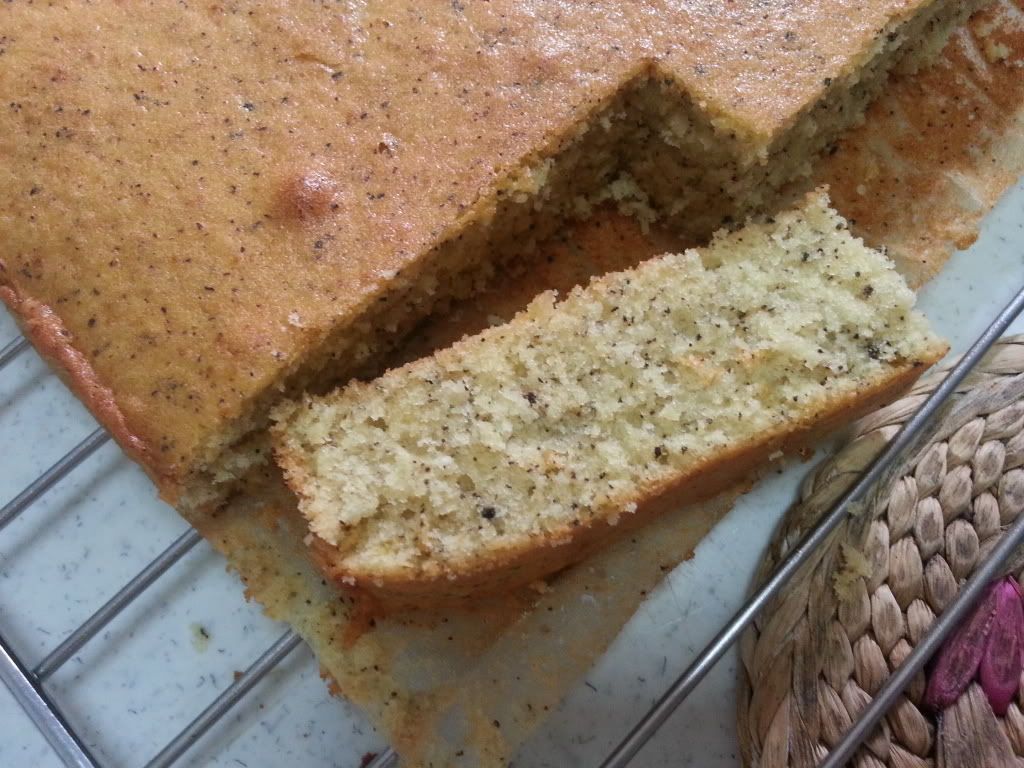
The cake turned out to be really soft and fluffy. I believe it is due to the fact that it was steamed. Steamed food just have this alluring factor. Another interesting fact is that this cake uses carbonated drinks for it's soda that makes it rises up. The most important reason why I love this cake is that IT IS TOTALLY OIL FREE!!! Not a single drop of oil is used at all. Therefore, it made washing up super duper easy!! I hate washing up oily dishes everytime after I bake. Also, the oil free factor made this cake very addictive. I had to control my hands that were constantly reaching out for more of the cake.


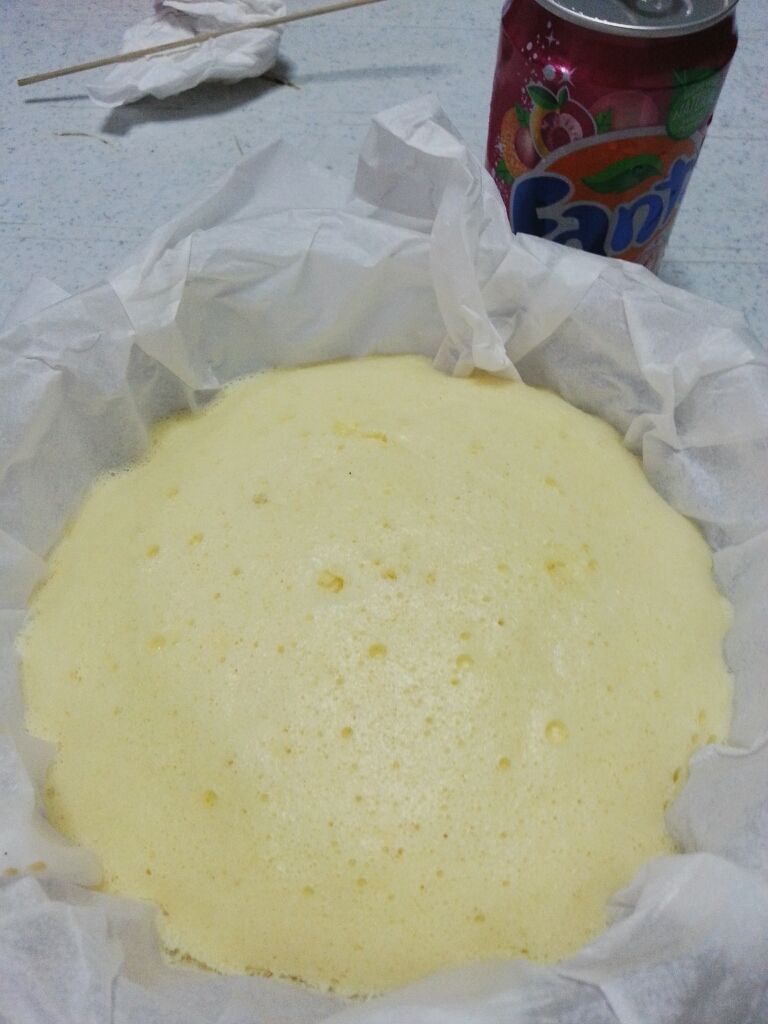
Hehheh, I used peach flavoured fanta! That's the only can of soft drink that I could find at home. Luckily the peach flavoured didn't turn out to be strong.

Recipe adapted from thelittleteochew

Recipe
- 220g eggs excluding weight of shells (about 4 large eggs)
- 210g caster sugar (I reduced it to 150g)
- 230g cake flour or top flour (sifted 2 or 3 times)
- 1 tsp vanilla extract
- 6 tbsp cream soda or 7-Up or Sprite

1. Whisk the eggs till frothy, then start adding sugar a little by little, to ensure it is well-incorporated. Add vanilla extract and continue beating until the batter becomes very pale, thick and creamy. This takes time, and there is no shortcut. Meanwhile, heat up your wok, pot or steamer until you get a gentle boil. Do make sure it is large enough to fit the cake tin and has ample space for the batter to rise and the steam to circulate.

2. Fold in the flour in thirds, alternating with the soda, and ending with flour. Once there are no streaks of flour, stop.

3. To steam, either pour the mixture into a bamboo steamer lined with greaseproof paper or use a 6 or 7-inch lined baking tin. Pop it into the wok, pot or steamer - then cover - and steam on high for 30mins.

4. Once done, place the cake on a rack and allow to cool before slicing.

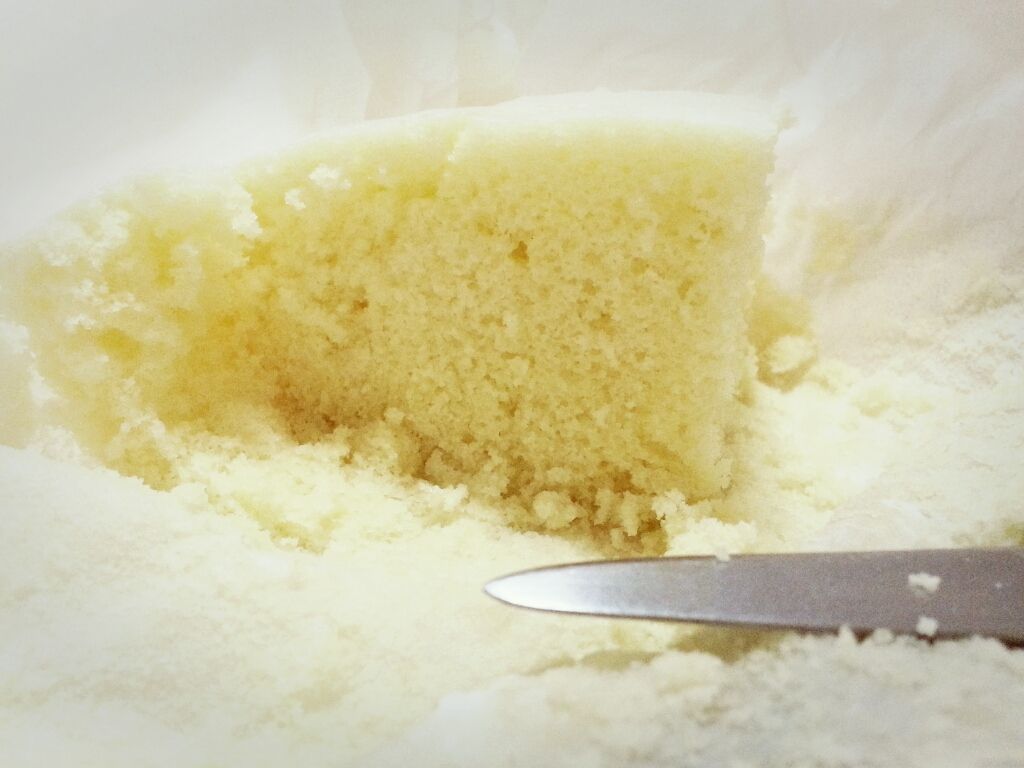
See the cotton-like soft and fluffy inside?

Some points to take note:
- Beat the eggs mixture until frothy, it should turn out to be creamy looking.
- Steam your mixture as soon as possible. Avoid letting it rest for too long. I separated my mixture into 2 portions and steamed one after another. The second batch turned out to be less soft. I believe it is due to the long resting time that caused the rising agent in the cake to be less effective.
- You can omit the vanilla essence if you have a stronger egg taste. I added vanilla essence but my parents commented that it tasted less egg-y as those sold outside.
- Reduce the sugar amount further if you do not have a sweet tooth. However, refrain from huge reduction as it would definitely make a difference to the texture of the cake.


Many many love for this awesome cake!

Thursday, May 23, 2013

Awesome Earl Grey Tea Cake

Hihihihi, any readers out there? I'm truly apologetic for not updating this blog for so many months. Previously I was really busy with school work hence I had no time to bake. Therefore, I was on hiatus for several months. However, the long awaited summer holidays have started, and it's time to start baking again! To be honest, I had already baked several times before this post, however all of them were failures (and thus I couldn't post anything up here!) But good news, today I baked something and it turned out so wonderful that I must share it with more people.


My family say that this is the best cake that I have ever baked. Personally I do love it as well! The subtle earl grey tea fragrant that lingers in your mouth after you eat it, and the zesty lemon that complements the tea flavour. Not forgetting the dessicated coconut that adds more texture to the cake. Thumbs up for myself! I'm definitely going to bake this again!


Original recipe from anncoo journal
150g Plain flour
1/8tsp Baking powder
150g Butter, softened
130g Confectioner sugar (icing sugar)
1/2 tbsp Glucose/golden syrup or honey
3 Eggs (70g each)
1/8 tsp Salt
5g Earl grey tea dust from 2 tea bags
20g dessicated coconut
1 tbsp Fresh whole milk
Lemon zest from 1 large lemon

1. Preheat oven to 170C. Line a 19 x 9 x 8cm loaf tin with parchment paper all sides up.
2. Sift flour and baking together twice, set aside.
3. Beat butter, icing sugar and glucose together until light and very fluffy. Gradually add eggs and beat well, then add salt, tea dust, dessicated coconut, lemon zest and milk. Mix well.
4. Add flour mixture and fold through completely using a spatula. Surface of batter should be glossy and smooth.
5. Pour batter into prepared loaf tin and for 50 minutes or skewer inserted into the center of the cake comes out clean. Note that the baking time may vary according to your oven.
6. When the cake is done, unmould cake and peel away parchment paper.
7. Leave to cool completely before serving. If storing, wrap with cling wrap.

I used a square tin that makes a thinner cake, thus my baking time is about 35 min only. Original recipe uses grounded almond instead of dessicated coconut and after cake is baked lemon syrup is brushed onto it. However the health conscious me has decided to do away with the lemon syrup. If you are interested do visit anncoo journal for detailed instructions!


I'm not kidding when i say that this cake is really gorgeous.

Look at the inside!